


|
|
|
Here is an example of what you can achieve, on the left is how they were and on the right is how they are now plus tires and bolts  Overview This 'how to' will be broken up into the following categories so if you wanted to just paint or polish then you can go straight to that section. 1. Materials & Tools 2. Preparation 3. Polishing 4. Painting 5. Notes, Cautions & Extra Pictures 1. Materials & Tools Polishing Materials and Tools High speed drill or air (pneumatic) die grinder Polishing Compounds (as follows) Black Emery Brown Tripoli White Diamond (or equivalent fine polish) Meguiar?s All Metal Polish 3-5 4? sewn cotton wheels (depending on what you do) 1 or 2 loose cotton wheels (same as above) Couple of Ziploc bags A couple clean cotton rags (an old T-Shirt works, now you have reason to get rid of that old shirt in your closet) 320 grit utility roll sandpaper (its flexible sandpaper that comes in a roll with various thicknesses, i used the 1" wide stuff) 320, and 600 Grit Sandpaper (the wet/dry paper seems to hold up better) Or you can go with a 400 grit greaseless compound plus another 4? cotton wheel or sisal(quite aggressive) instead of the 320 and 600 grit sandpaper 1 roll paper towels Reducer or Wax &Grease remover (Go with the Wax&Grease remover if painting plus it works better but it costs more) Here's a picture of the die grinder i was using 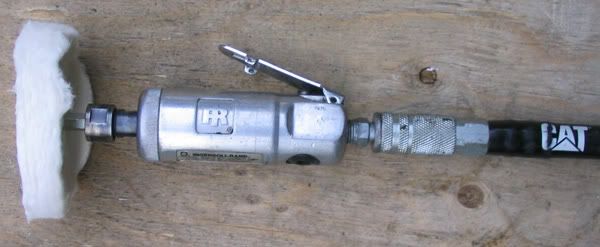 Picture of some of the materials needed for polishing 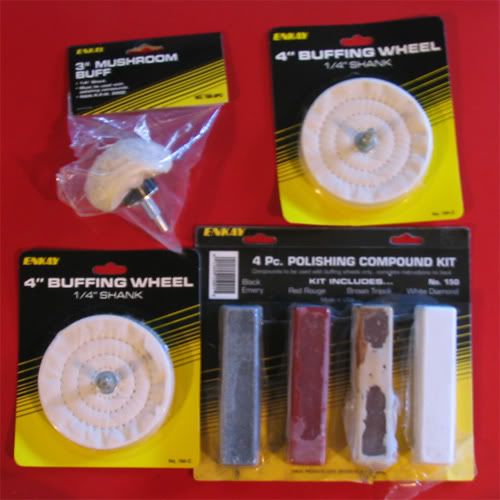 Painting Materials & Tools Masking Tape (3" and 1" or similar sizes) Razor blades (I like the square one sided ones) Wax&Grease remover 320 grit sandpaper or a red 3M scotchbrite pad Liquid Friskit (don?t have to but ill explain this stuff later) Paint Stripper (make sure its safe on the type of metal you are using it on) Rubber or latex gloves Paint Brush Wire Brush Paint Supplies: Primer & Hardener Paint, Reducer & Hardener Clear, Reducer & Hardener Paint gun Or unless you are using spray bombs then just get some primer, paint, and clear is you want And definitely a paint mask, not a paper filter one but an actual mask 2. Preparations To start, give your wheels a good cleaning with soap and water to get off all the road grime and dirt. If there is paint on there that you will be removing, I would suggest removing it now with paint stripper and a wire brush (you might not even need the wire brush) more of this will be in the paint section. You could also just glass bead (not sandblast) the whole area that will be polished and painted as this saves preparation time but requires a tiny bit more sanding (I should of done this first) but always do a test spot in case the glass beading is too aggressive(so try on the back of the wheel). Remember to remove any valve stems and bolts/nuts still on the wheels. 3. Polishing To start your wheels should be nice and clean or glass beaded. How it looks glass beaded 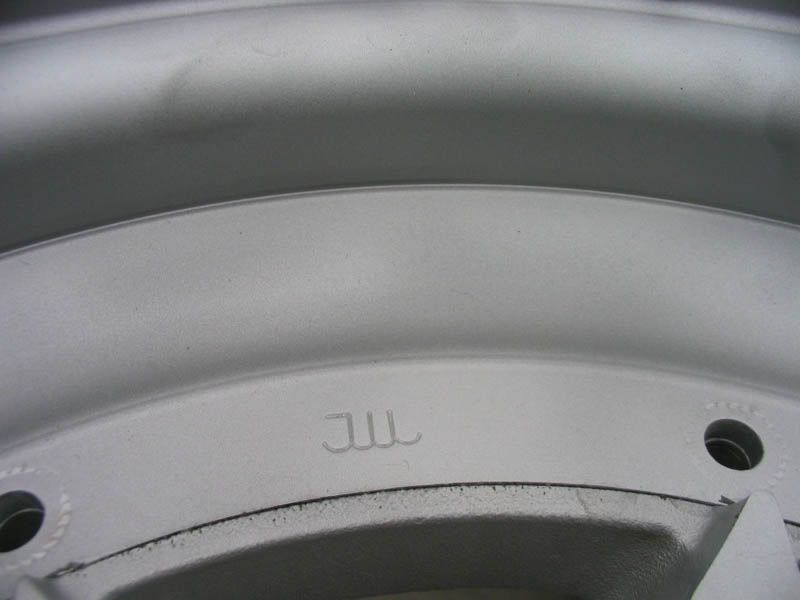 Start sanding with the 320 grit or use around a 400 grit greaseless compound on a spiral sewn wheel and follow the direction of the wheel when sanding (like when sanding don?t sand towards the center of the wheel but with the curvature of the wheel), I find any grit lower than 320 too aggressive and then your removing those scratches with finer sandpaper instead of polishing. Also remember any areas that you will be painting you will not need to polish and I would suggest not to as it will give it a rough surface for the paint to adhere to but you can do this stage on them if there pretty rough and you want a nice smooth paint finish. To do the lips of the wheels I suggest using some 320 grit utility roll as it is a lot faster to sand the lips and still keep them all rounded. For people who haven?t used this, what you do is rip of a long piece like 12? or so and take one side in one hand and the other side in the other and move your hands in a left to right motion or up and down motion along the rim, just like if you were milking a cow or polishing someone?s shoes. You will get dirty I will warn you, this is also the time to remove any curb rash, and to get into small cracks or crevasses you can use the back end on a pencil wrapped in sandpaper, you could just use your fingers but they will get tired eventually(trust me i know but its effective). See you do get dirty 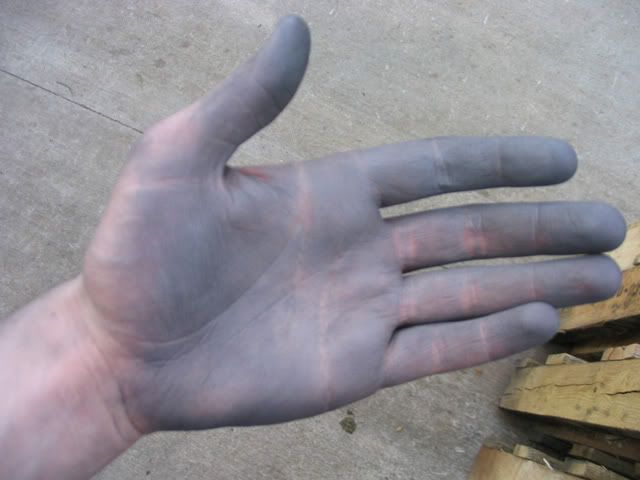 Nasty Nasty Curb Rash  Example of Sanding Method 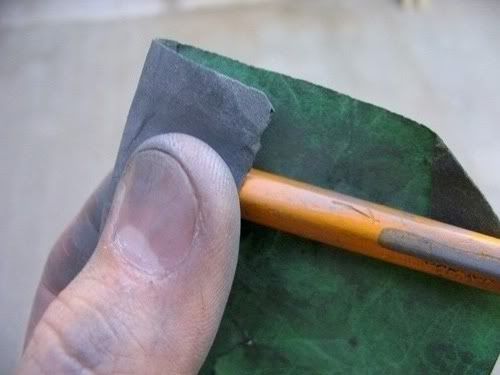 The point of the 320 grit is to remove any of the oxidation and make the wheel all uniform. Aluminum produces a really hard oxidization that you will have to get rid of or else the polishing process won?t even work. This picture demonstrates what happens if you do not remove all the oxidization. Before and After Pic  Also here is a picture of the difference between being partially polished vs stock Note: i did this by taping off a section of the wheel and did this solely for this article in NO WAY i suggest you doing this as it left a high area all along the line which i had to sand flush later 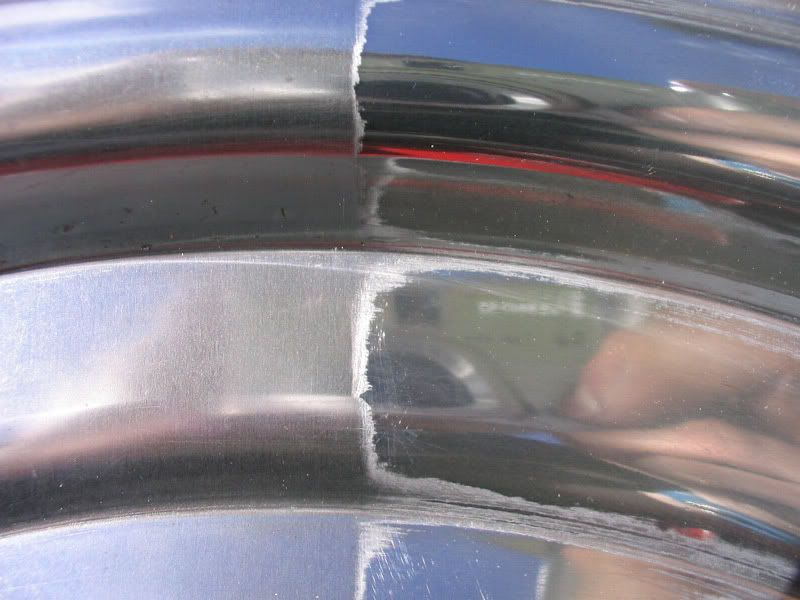 After you are done sanding or using the greaseless compound (if using the greaseless compound wash your wheels first to avoid cross contamination), start with the black emery compound on a new wheel. To avoid cross contamination between the different compounds, as it can put bigger scratches than the stage you are at and will require more work, label all the wheels with a Sharpie and also put the compounds and wheels in labeled Ziploc bags. How I Labeled 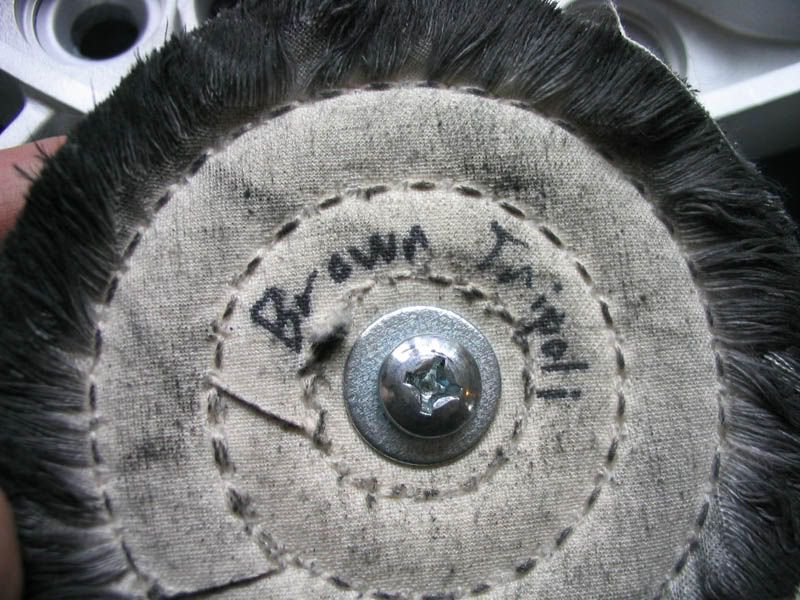 Just like before follow the same direction as the wheel, there are two directions you can go in; one is to go the opposite direction as the wheel is turning (this is called cutting), and then there is when you go the same direction as the wheel is turning (this is called coloring). See figure for better explanation. At this stage it is best to use the cutting action till you get down to the really fine compound where you will use the coloring action instead. You can also put a fair bit of pressure when using the Black Emery and the Brown Tripoli. 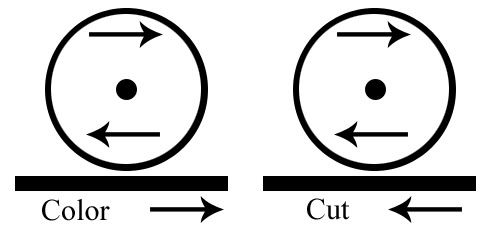 Next I used some 600 grit sandpaper to remove all the bigger scratches and make the wheels all nice and smooth. You might not need to do this step but I did as I was using the 320 grit sandpaper before instead of the 400 grit compound I have now. There are also fine grit greaseless compound out there but they are usually a bit harder to find. How they should look after being sanded with 600 grit  Wash the wheels again. Wash between every stage. It might seem daunting but you will get way better results in the long run. One piece of course grit left behind can mess up a smoother surface later on, also from the brown Tripoli on you can use the wax and grease remover to remove the compounds as I found it easier than straight washing but its also a lot more expensive. Now use the Brown Tripoli compound on a new spiral sewn wheel and use the cutting action like above. Then we move on to our white or equivalent fine compound (remember to wash or use the wax & grease remover). You can use either a loose cotton wheel for this one or just a normal spiral sewn. I used the sewn one as that?s what I had at the time and it worked great, but now we will use the coloring action instead. When using the coloring action be very careful around edges as the spiral wheel will want to run away from you and this can cause some damage that will take more time to get out (I did this a bunch of times until I got the hang of it). Now we wash again and I would suggest changing the washing water between all the stages, as there could be grit suspended in the water and this goes with what you are washing the wheels with too, i.e. sponge or cloth rag, also when you start using the finer compounds I would NOT suggest using hard bristle brushes for cleaning but there are soft bristle brushes you can use. By now you will notice a nice polish that some would just leave at that but I went the next stage and used Meguiar?s All Metal Polish (mmmm coconut goodness, you will understand if you have some). Now you need very little of this stuff when you?re at this stage from all the polishing before (more work earlier makes less work later). You can use either a clean cotton rag or a loose cotton wheel, now if using the cotton wheel you have to be on a low to very low rotational speed. If it spins too fast the compound heats up and forms a black layer on your wheels. Don?t worry, if this happens it just means you were going too fast and you will always produce a little of this. My die grinder was right around stall speed, it would rotate quite slow compared to before but when a little too much pressure was applied it would stall out and very little pressure is needed at this stage. Mmmmmmm Coconut Goodness 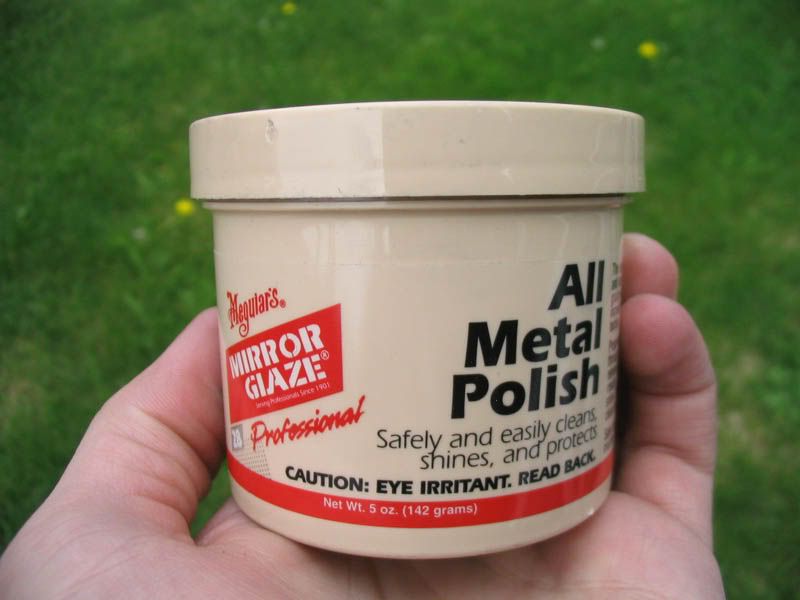 Example of how much is needed 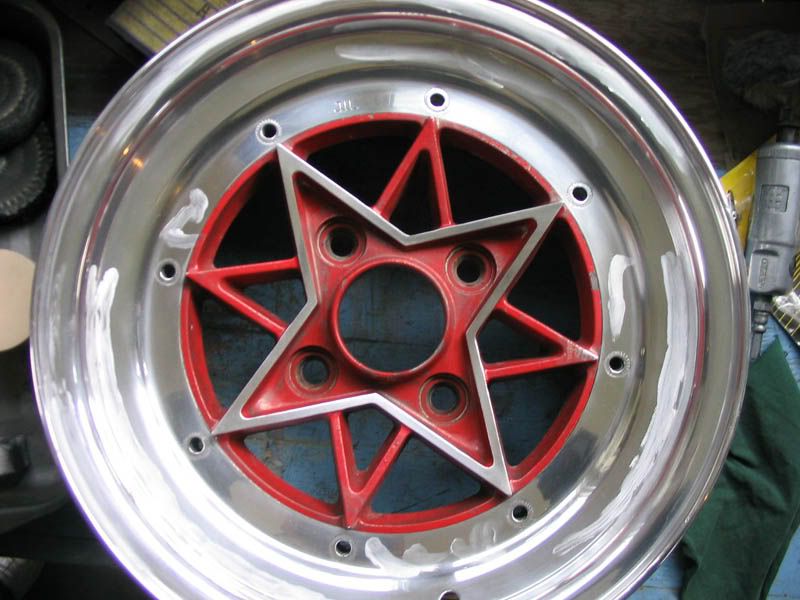 A picture of the comparison of using or not using the All Metal Polish, the wheel on the right i used it on 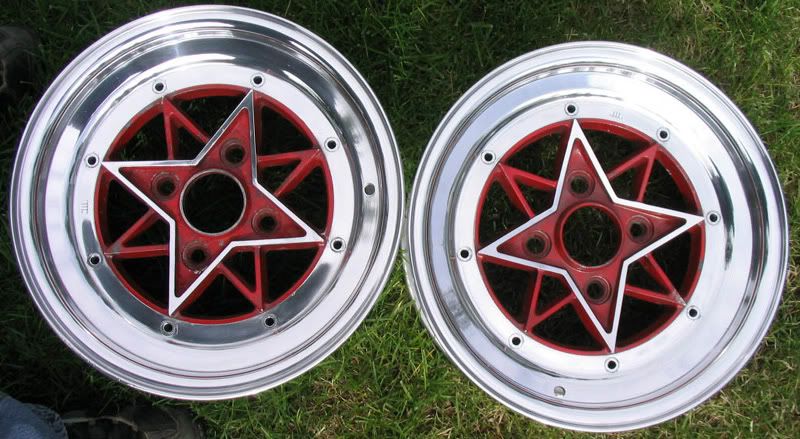 Once you are done this go over it will a clean cotton rag with a bit of polish on it to remove the crusty black polish (if you were using the cloth from the start you don?t have to do this) and then just wash it (avoid previous grit at all cost) and then you can go over it with a clean cotton cloth to dry it, as if you have hard water like I do it will leave spots, and then you can just apply a little bit of polish to areas you think that need it. Now you have a nicely polished wheel! You can clear coat this but I find clear coated wheels chip, become hazy, and just look bad later, as all it takes to keep up the wheels if they do not have a clear coat is a little bit of polishing with a cotton rag and some polish each time you wash you car(5 min), which is perfectly acceptable in my books. Nicely polished, ready for painting 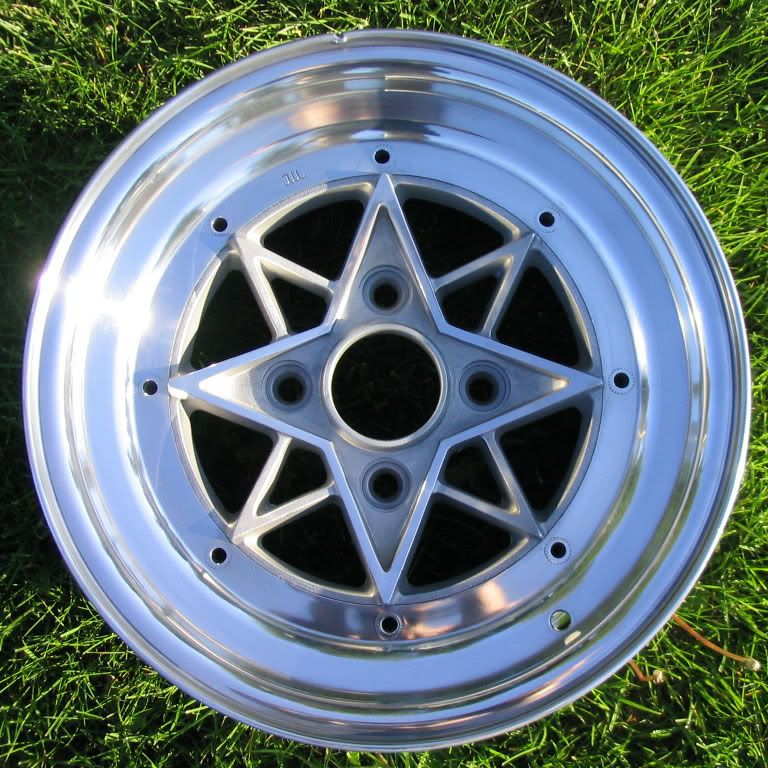 4. Painting/ Priming First wash your wheels to remove and dirt and/or road debris. Also remove pieces like valve stems and bolts, like in my case. If the wheels have previous paint on them this is where you will need to remove the paint. There are two choices one you can glass bead the wheels (but remember to do a test spot in case it?s too aggressive, usually on the back of the wheel where it won?t be seen) or paint stripper, as most of the people who would be using glass beading already know how to do it I wont explain how but I will explain the paint strippers as anyone can do it. A picture of the various stages of painting 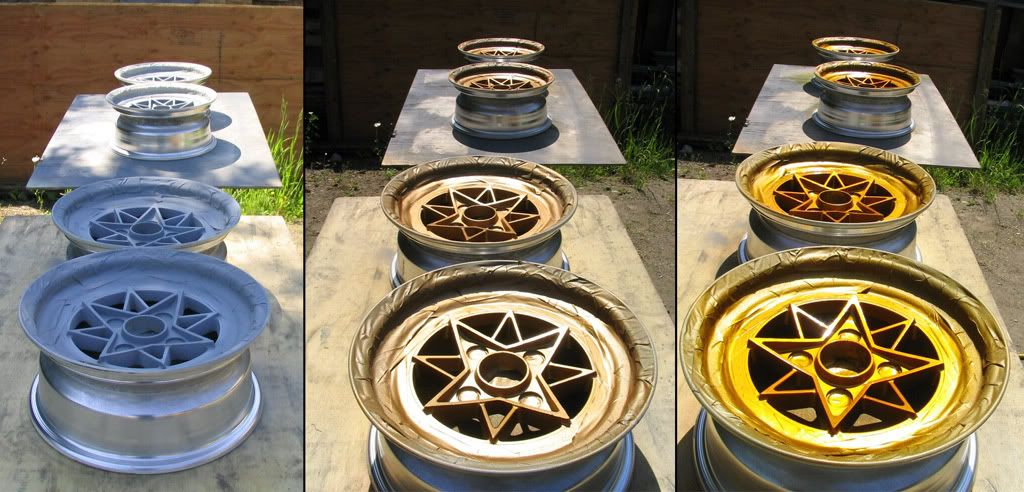 First make sure the paint stripper that you buy or have already is safe for the type of material that your wheels are composed of. I would suggest before you start to put on some rubber/latex gloves as the paint stripper will burn (for those who don?t know the experience of the nice cooling sensation followed by an incredible burning sensation, heed my warning). Now pour some of the paint stripper into a small container as you never want to keeping dipping back into the main container as any residue paint you bring back will dilute the concentration, use a small paint brush, an 1? or so wide, to apply a generous (and I do mean generous) coating over the painted area. Do this outside as the fumes from the stripper are bad, plus do it on either an old piece of plywood you don?t care about or an area of your yard that you don?t care if the grass dies in. You will probably see the paint stripper start working right away, so leave it for like 20 mins or as the directions specify, and come back and use a little wire brush or old tooth brush to remove the paint (don?t use the tooth brush to brush your teeth after :P thus is why I said old). And then just wash the wheels. It may take several times for all the paint to come off the wheels so don?t expect it to come off all at once. Now we scuff the areas that need painting with a either some 320 grit sand paper or a red scotchbrite pad (if you did some polishing and are going for the half painted half polished look you know already you probably don?t need to do this so you can just go straight to the masking step), now scuff all the areas that you will be painting. This is done to provide a base for the paint to adhere to. Then we clean the wheels with wax & grease remover as any left over grease can cause adverse effects in the paint(fish eyes and such). Then we mask the wheels. If you?re painting the whole wheel you won?t need to do this step so continue to the next. This can be tricky depending on what you are masking. The point of this is to mask off the areas of the wheels that you don?t want paint on like what you have just polished. I used basic 1? masking tape around the edges of all the areas that I polished. You can either follow the edge exactly with the edge of the tape which is hard to do or you can apply it over the edge and use a sharp razor blade to cut away the excess like I did. What I did is I applied tape all around the edges and then ran a plastic rounded object like the end of a CLEAN screwdriver handle all along the edge to make sure the tape was firmly secured to prevent bleed through, and then I ran the razor blade along the edge at a slight off axis angle so that I wouldn?t have any tape over hang left over when cutting off the excess, be VERY careful around the polished areas as you wouldn?t want to damage them. How i masked my wheels, note im not done masking in this photo  Now if you have tricky areas that you need masked this is where I would use liquid friskit (it?s available at any art store so just ask an employee). Such places are like the bolt holes in my case. What this stuff is, is liquid silicone rubber that when dry provides a thin rubber coating over the area you don?t want painted, to apply it you can use a small artist paint brush (though it will ruin the brush) or as I did I used some small round plastic sticks I use in modeling (there actually pick-up sticks). What you do is you dip the stick in the liquid friskit and then run it along the edge of the area you are trying to mask. I suggest practicing a little bit before you do this as this stuff tends to dry pretty fast and will adhere to the stick if you do it too long, plus you will get to know how it works. Once you have painted over this stuff just rub your finger over it and it should come off. If not, use a razor blade to get it started. After all the fine masking you can then use either wider masking tape or masking paper taped along the edge to cover the bigger areas. Now, when masking, make sure you paint quite soon after as masking tape has a tendency to shrink if left too long. Now we move on to priming. I highly suggest this but if you are just using spray bombs it really doesn?t matter too much. I primed my wheels with some old DP40 that I mixed up that we had laying around using a spot repair paint gun that I picked up a princess auto for 30 CND (its actually a debadged DeVilbiss that goes for 90+ at places like Sears). I also used this paint gun for the rest of the paint. Now, when painting, make sure you use a mask as there are nasty chemicals in the paint. Also wear pants, long sleeves and latex gloves cause you don?t want the paint on your skin. Any residue oil from your skin applied to the painting surface can cause ?fish eyes? in the paint surface. Here is me showing an incorrect placement of a paint mask  I would suggest painting/priming right in the morning if you don?t have access to a spray booth, as in the morning the bugs (you can see one in one of the below pics) are not out yet and it?s nice and cool with a light dew on the ground(which keeps the dust down). Now I did this on some old sheets of plywood which were up on stands so painting was easier. The technique I use when painting/priming is to start spraying even before you?re at the object, like you start on the left side start spraying then move over the object while still spraying till you?re off the right side of the object. This avoids the problem of too much paint building up in one area. After the primer is done drying you should give it another scuff with the scotchbright pad or some fine sandpaper before you apply the paint, this removes any high spots and debris which might have gotten on the paint, plus any binders that came to the surface when drying. After scuffing clean again with the wax & grease remover and then mix up the paint you are going to use and spray it in the same manner as above. If using spray bombs you obviously don?t have to mix the paint but you should use the same technique and max sure to shake that can. You might need a couple of coats so apply light coats of the paint not one thick layer. This avoids drips in the paint. Apply one light coat then let the paint tack up (when the paint sticks to your finger but doesn?t actually deposit any paint on your finger, do this on the masking). When it tacks up you can apply your next light coat. If you make a mistake or a bug gets in it(depending if you painted over it or its just stuck on the surface, if just stuck on the surface and you notice it pluck it out when the paint still wet with some tweezers the let the paint dry before sanding, and do not paint over that area if it happens) so let the paint dry and lightly wet sand out the mistake with 1000 grit sandpaper or higher and then reapply the paint. If using a metallic or pearl paint DO NOT sand the top coat because you will remove the top layer of particles which will make it look dull. After this you then apply the next color if you are using one, like in my case I applied a yellow kandy over the metallic basecoat. Most probably wont need to do this, I didn?t either but I wanted to and the results speak for themselves. Here are a couple examples of the difference in color 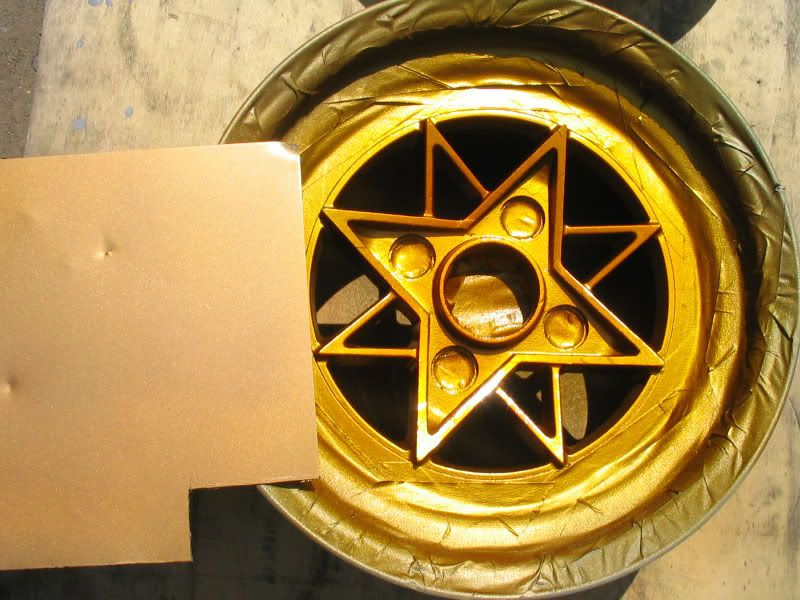 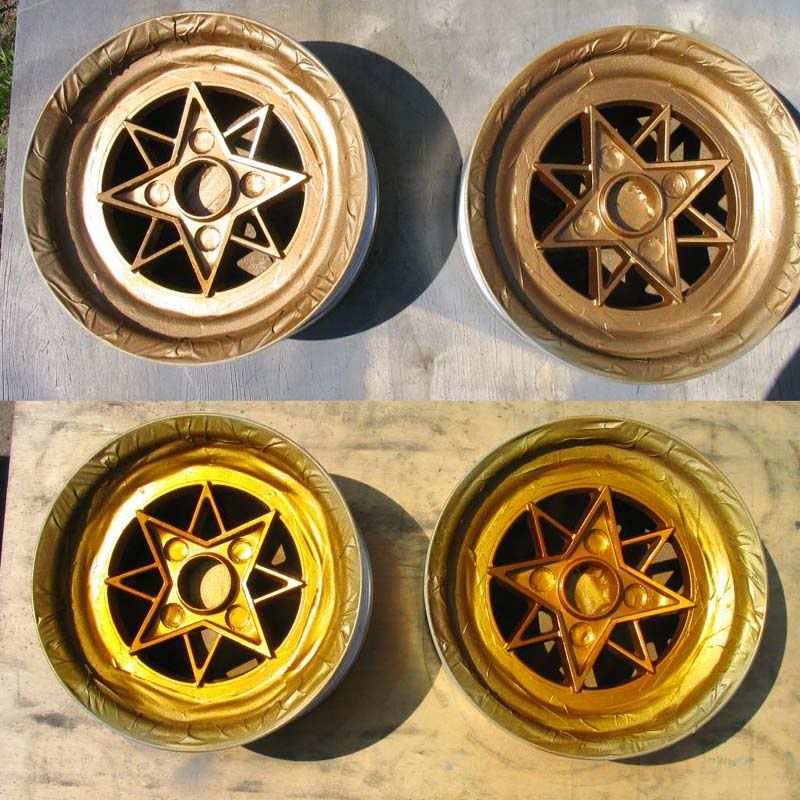 Now we apply the clear coat for protection of the paint, apply in the same matter as above. I would still clear even if I was using spray bombs as it is just another layer of protection which will prevent metallic from becoming dull. Oooooo Nice 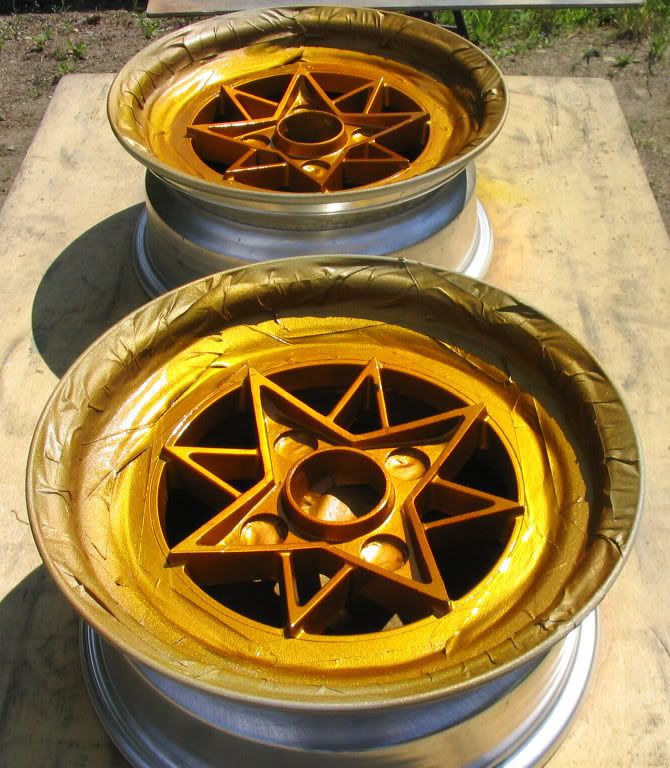 Then wait until the paint is almost dry (a little bit beyond the tacky stage) and then start unmasking. It is best to unmask when the paint isn?t totally dry as it is easier to get a defined edge. When unmasking make sure pull the tape back on itself and on the edges as it prevents the paint from lifting. Also if you have some bleed through you can remove it easier. Before and after unmasking 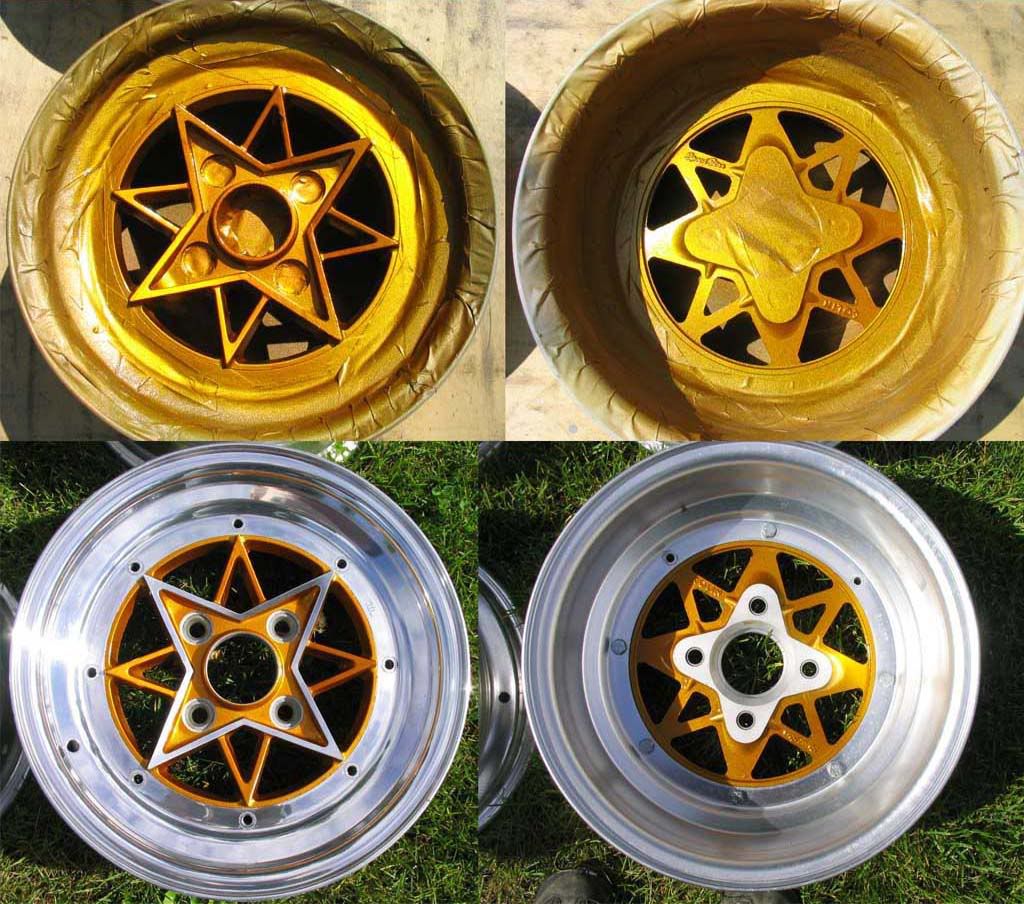 Then you just have to wait for the paint to cure and you have a nice set of wheels! Before & After  5. Notes, Cautions & Extra Pictures Polishing notes Don?t cross contaminate between compounds. I would suggest polishing outside unless you want a whole bunch of little cotton strings all over the place(should of saw the mess i made). Wear safety glasses. If you wear long sleeves shirts they could get caught in the die grinder just to warn you. Painting Always wear a mask when painting. If you need to remove a bug, just use tweezers. If you need to fix a mistake let it dry first (except if it?s a bug then you should pluck it right out). When painting with a paint gun, always clean it right after using it and after each color as you wouldn?t want primer in the basecoat. Extra Pictures ooooooo  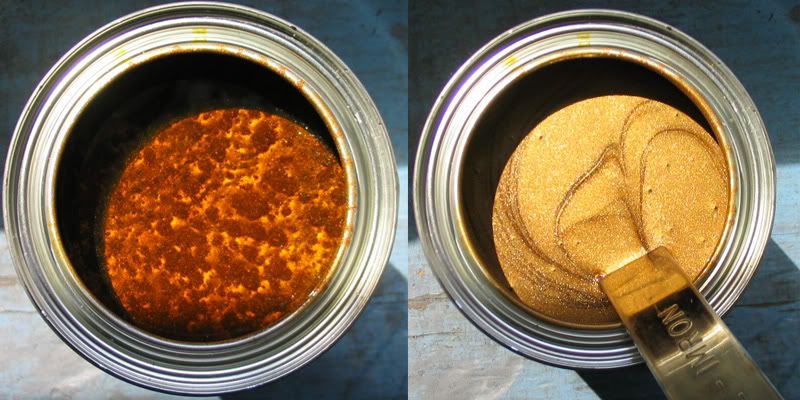 Now that you have this nice set of wheels you might want to mount the tires yourself because you might not trust your tire shop. Mmmm the scent of new rubber 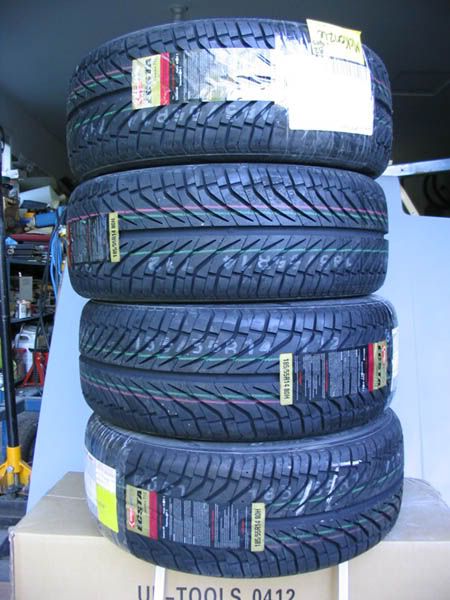 Legal mumbo jumbo just in case All pictures I took myself therefore they belong to me, a.k.a. Loki440/Kyle Mckenzie, and for any redistribution you have to ask me first and they cannot be used for resale use. As for any brand name items, their names are copyrighted to the apparent company, and in no way am I affiliated with them. By reading this and still doing the stuff as in the above document I am not held responsible for any damage done to yourself and/or your property.
|
![]()
2026-04-30
Tokyo, Japan
NF
NB-NS-PE
ON-QC
MB
SK
AB
BC |
![]()
![]()
This site was designed and maintained by:
![]()